 Latest images
Current date/time is Tue May 07, 2024 12:22 am
MAIN QUEST HELP
MAIN QUEST HELP
- Topics
- Posts
- Last Posts
UNBOUND
Objectives
- Make your way to the Keep
- Enter the Keep with Hadvar or Ralof
- Escape Helgen
- Loot Gunjar's body
- (Optional) Search the barrel for potions
Walkthrough
As soon as the Dragon mucks up your execution, the first quest of Skyrim begins apace. With your hands still bound, you are powerless against enemies, nevermind the dragon. Quickly sprint into the building in front of you and make your way up the stairs. The dragon blows a hole right through the wall, giving you a clear view of the adjacent house to which you can jump. Meet Hadvar outside and follow him until you reach the Keep and a branching point: You can choose to run with Hadvar (Imperial) or Ralof (Stormcloak).


Now, depending on who you go with, things will pan out a little differently. With Hadvar, you have members of Stormcloak to wrangle with; conversely, you'll be attacked by the better equipped Imperial soldiers if you side with Ralof. Ultimately, though, you'll need to acquire the [[Helgen Keep Key]] one way or another and make your way through this area all the same.


In the first room, you'll have your hands freed so you can walk around and learn to loot bodies (and chests if you're with Hadvar). Procure your first pieces of equipment and weapons then equip them. Actions like sprinting, swinging your weapon, or basically anything that requires physical exertion will zap your stamina gauge. Keep an eye on it at all times to make sure it isn't fully exhausted in the middle of combat.


Follow your cohort of choice to a room that can be plundered for a variety of objects, including really helpful consumables like Potion of Minor Magicka, Potion of Minor Healing, or Potion of Minor Stamina. There are also things like Salt Pile, Tankards, etc. that you can pick up, but keep in mind that each item (including weapons and armor) adds an encumbrance value. In other words, pick up items you need and discard stuff that you do not need.
The torture chamber introduces you to the wonderful art of lockpicking. You can learn more about this skill in its appropriate Lockpicking section. Successfully picking the cell's lock rewards you with some Gold coins, a Potion of Minor Magicka, and a book. If you're keen on needling more locks in the future, you'll want to search the rest of the room for more lockpicks.
Continuing on, you'll encounter more humanoids to kill, but as you delve deeper into the dark, damp caves you'll fight Frostbite Spiders, which drop Frost Venom, be able to loot egg sacs for their Spider Eggs and Skeever Tails. The latter is relinquished from the sacs hanging from the ceiling. Your companion will express hesitation in facing off against the slumbering bear ahead, but she isn't tough at all and yields Bear Claws and a Bear Pelt. *Note* You may attack your companion without him attacking back, so you can increase your one-handed, 2-handed, etc. When he starts to sneak and says he will follow your lead you also will be able to attack him in sneak mode to increase your sneak easily.


From this point, the exit is just a skip away, as you head into the overworld map of Skyrim and finish this beginning quest.
- 0 Topics
- 0 Posts
BEFORE THE STORM
Before the Storm begins as soon as you finish Unbound. The quest reward is Steel Armor.
Objectives
Note: the person you talk to is different depending on who you choose to follow at the beginning of the game. (Gerdur if you follow Ralof, or Alvor if you follow Hadvar)
Walkthrough
No matter who you emerge from Helgen with, your next destination lies in Riverwood, a town not far from here. Both companions have some relatives there that you can speak to and generously receive supplies from. En route to town, you can speak with your companion and learn more about the dragon and the background of his corresponding faction, at which point he attempts to -- albeit not forcibly -- recruit you to join the faction's collective cause. You can choose sides later; for now, continue to Riverwood.
Tip: Skyrim is a vast, vast place that you can easily get lost in. Your interactive world map is a your life support in times of finding your destination.
Guardian Stones stand just off the path as you head towards Riverwood -- they're hard to miss. You can inspect them, but are only allowed choose one (rogue, warrior, or mage for the moment) to receive a certain percentage boost in your learning speed. Obviously, go with what your race specializes in. For example, a Breton would benefit most from the Mage Stone, which blesses the person with accelerated learning of magic skills.


In Riverwood, seek out the person you are supposed to by following the person marker on the compass. Either party is incredibly hospitable and will provide you with a number of respawning supplies free of charge. Take what you need (or take them all) and continue to probe the person of interest for any morsels of information. Eventually, the next task comes up: Talk to the Jarl in Whiterun, a sort of central location in all of Skyrim.
Riverwood is worth exploring for a few sidequests. Specifically, you can pick up The Golden Claw and miscellaneous tasks that include saving or sabotaging a burgeoning romance in the little town. The latter can be picked up by speaking with Sven, a bard that frequents the Sleeping Giant Inn. There's an alchemy lab in the Sleeping Giant Inn that you are free to use as well.
Tip: Red text means that you are about to do something unlawful and that could lead to unwanted repercussions.In the Riverwood Trader, Lucan is more than willing to offload one of his burdens upon you, tasking you with retrieving The Golden Claw. Of course, he rapidly assures that you will be rewarded for your efforts.
When you're ready to set off for Whiterun, leave Riverwood and follow the quest marker. Outside the periphery of Whiterun are a number of farms, stables, and a meadery that balk at outsiders. You can see the high stone walls surrounding Whiterun; when you reach the entrance, a guard stops you and tells you access into the city is limited to official business right now. Normally, you choose between persuasion, bribery, or intimidation, but in this case you can simply inform the guard that Riverwood seeks aid. He lets you pass without a hitch.

 Tip: In Whiterun, you'll find a Shrine of Talos that, when activated, will cure you of all diseases. You'll find many other God Shrines all over.
Find Dragonsreach, one of the higher buildings in the Northeast most corner of town. There are boundless steps leading to it. Any news of the dragon you may bring will win the Jarl's rapt attention. The quest ends as soon as the Jarl decides to dispatch help to Riverwood.
- 0 Topics
- 0 Posts
BLEAK FALLS BARROW
Farengar in Whiterun gives you Bleak Falls Barrow, but if you've already visited the area prior you won't need to visit it again.
Objectives
- Talk to Farengar
- Retrieve the Dragonstone
- Deliver the Dragonstone to Farengar
Walkthrough
If you partook in The Golden Claw earlier, you will have already visited this area and also procured the item that Farengar requests. Speak with Farengar and, if you already have the Dragonstone in your possession, you will have the dialogue option to show him. If not, you will need to proceed to the Bleak Falls Temple (preferably with The Golden Claw quest ready in your log as well) and wade deep into its cavernous depths to find the Dragonstone.
Head toward the snowy mountains to soon encounter bandits and enemy archers. Head toward Bleak Falls Barrow and enter the decrepit Bleak Falls Temple. The interior is sparsely populated at the moment, but you'll find plenty of Skeever carcasses to pick at, as well as a locked chest on which to practice your lockpicking. After putting down the first two bandits, you won't encounter another until deeper in. Be sure to loot the burial urns for some Gold pieces and relieve the shelves of some potions as well.


You reach a room with a lever and a gate. When you initially try to pull the lever, you'll initially be met by a shower of arrows -- obviously this is an unintended result. This mini-puzzle requires you to flip the three pillars on the left side to match the correct sequence of the pillars displayed above the gate. The pillar in the middle has fallen to the ground next to the lever. The correct sequence is: snake, snake, swordfish. Pull the lever once you've set this pattern to open the gate.
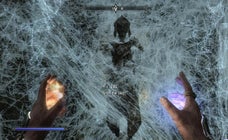
Reading the Thief book ahead improves your Lockpicking a bit. Descend the spiral stairs to the cobweb-filled area below; be sure to pick up the Scroll of Fireball. Hack through the thick wall of cobwebs and proceed to meet up with Arvel the Swift. You discover that this grandmaster thief has been captured by a Frostbite Spider, but managed to mortally wound and significantly weaken the giant arachnid. Finish it off and speak to Arvel. Before freeing him, inquire about the golden claw.

The double-crossing scum will try to run away, screwing you out of the claw. Take him down and loot his body for the Golden Claw. You begin to head into the crypt, from which draugrs emerge and attack. These are stronger foe than the bandits you've been seeing, so avoid dealing with too many at once.
Time the swinging axes and sprint through the corridor as soon as they retract. In these tighter spaces, you'll encounter more draugrs, but notice that the slick, iridescent liquid on the ground -- it's flammable. Lure the draugrs over it and light it afire either with fire magic or knock one of the flame lanterns onto the oil. One more Draugr pops out from the coffin; slay it and loot the chest for Gold and a Scroll of Hysteria. Pull the chain nearby to access another part of the temple. This area is prime farming ground for Glowing Mushrooms, which can be harvested from the walls as you come to them.


The linear path leads outside to a small waterfall, the base of which features a chest and corpses to loot. The path eventually takes you to a restless draugr, a slightly sturdier variant that might require more effort to slay. The door ahead leads to Bleak Falls Sanctum. More draugrs, but there's also more oil to help you out.
Through the iron doors at the top of the stairs, you walk down the hall to the stone door ahead. On the stone door are a set of rings with symbols and a keyhole in the shape of the Golden Claw emblazoned on the door. You can rotate each ring individually and match the engravings on the Golden Claw itself. Inspect the Golden Claw in the items menu to clearly see the correct order. The solution, from bottom to top bear, hummingbird, owl. Afterwards, put the Golden Claw in place to open the door.


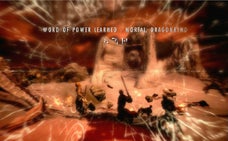
Move towards the engravings on the Word Wall to learn Unrelenting Force, at which point a Draugr Overlord appears. Use the uneven terrain to your advantage; the Overlord has a hard time of keeping up with you if you alternate between a high point and low point, using a bow or long-range magic to deal damage. Loot the Dragonstone from its dead body. After doing so, be sure to check both waterfalls. Each one has a chest that can be looted. The chest behind the waterfall on the right will require a lockpick to open. You can then continue up the stairs making your way back to Skyrim.
- 0 Topics
- 0 Posts
DRAGON RISING
You'll receive Dragon Rising as soon as you finish Bleak Falls Barrow and present the Dragonstone to Farengar. As a reward for completing this quest, you will receive the magical weapon: Axe of Whiterun.
Objectives
- Talk to Jarl Balgruuf
- Meet Irileth near the Western Watchtower
- Kill the dragon
- Investigate the dragon
- Report back to Jarl Balgruuf
- (Optional) Use your new Shout power
Walkthrough
With all this talk of dragons, one seems to have finally been unintentionally summoned. Irileth, Farengar, and yourself must convene at the planning room just beyond the Dragonsreach Jarl's quarters located within Dragonsreach to speak with the Jarl. The Jarl gives you the Iron Helmet of Minor Destruction and the party scatters. You'll need to rendezvous with Irileth outside of town. Leave Dragonsreach and head toward the Western Watchtower, not far off from Whiterun. Irileth and her band of guards stand just outside the watchtower's ruins. A dragon has very recently laid waste to it and should still be around; as you head toward it, a dragon by the name of Mirmulnir appears.


Apparently, this dragon is quite the weakling since iron arrows can easily pierce its thick dragon hide and inflict decent damage. Hopefully, you've hung onto a bow and have a decent command of archery. Fire arrows while the dragon remains airborne. Periodically, Mirmulnir will land on the ground and breathe fire, but this also means she is within attacking range. If you have an affinity to magicka, she is particularly vulnerable to ice-based magic. With help from Irileth's men, Mirmulnir's strength will slowly ebb and finally cause her to fall.


Rummage through her carcass for a surprising number of items. Of particular note is the first of many Dragon Souls you'll collect. You'll now be able to put that Unrelenting Force you discovered earlier to good use. Now you can experiment with Shout, which can be found in your Magic menu and used as afforded by completion of its cooldown timer.
Return to Whiterun and speak to the Jarl. Brief him on what happened and mention the tidbit about Dragonborn, to which Jarl tells you about the Greybeard's summon. Remember that booming thunder-like sound you heard as you ran toward Whiterun earlier? That was the Greybeards. The Jarl's parting words bestow you the greatest honor of the title Thane of Whiterun, as well as his eternal friendship.
Tip: You can abuse your power to basically delete one unlawful offense. If you're caught multiple times, however, even your swank title won't keep the hammer from falling down on you. A good suggestion would be to use your "Get out of jail free" card to steal a horse in the Whiterun Stables ouside and use it to travel to faraway areas that would otherwise be too time-consuming to reach on foot.
- 0 Topics
- 0 Posts
THE WAY OF THE VOICE
After demonstrating your extraordinary ability, you are summoned by the Greybeards dwelling atop High Hrothgar and begin The Way Of The Voice.
Objectives
- Speak to the Greybeards
- Demonstrate your “Unrelenting Force” Shout
- Speak to Arngeir
- Learn the Word of Power from Einarth
- Demonstrate your “Unrelenting Force” Shout (3/3)
- Learn the Word of Power from Borri
- Demonstrate your “Whirlwind Sprint” Shout
- Speak to Arngeir for further training
Walkthrough
The Greybeards dwell in a monastery located in High Hrothgar. Perched atop a perilously tall mountain, High Hrothgar can be reached via Ivarstead. Head through the town to find a bridge leading to a path that snakes up the snowy mountains. It’s going to be a rather long trek that is -- luckily -- filled with few hazards, but you might encounter a frost troll.


NOTE: While scaling the mountain, you may come across a dragon, just as you reach the peak. Kill it, absorb its soul and keep on trekking!
Inside, Arngeir calls you the Dragonborn with doubt filling his voice. To put his doubts to rest, use the Unrelenting Force Shout and speak to him again to learn more about the Greybeards and your destiny. You learn that each Shout consists of three Words; you learned only the first word - Force - of Unrelenting Force earlier and now you will be taught the second: Ro.


After learning Ro from Einarth, hit the targets that appear with your Unrelenting Force three times before the Greybeards are satisfied. Borii will guide you to your next trial outside in the courtyard.


The Greybeards gather here to teach you one more Shout before they send you off elsewhere to complete your training. You learn the first word -- Wuuld -- of Whirlwind Sprint, which lets you dash forward with incredible speed. To use the shout, bring up the Magic menu and "equip" Whirlwind Sprint from your list of shouts. Talk to Arngeir to open the gate and use the Whirlwind Sprint to explode past the gate to finally complete Way of the Voice and move onto The Horn of Jurgen Windcaller.
- 0 Topics
- 0 Posts
THE HORN OF JURGEN WINDCALLER
Objectives
- Retrieve the Horn of Jurgen Windcaller
- Read the note
- Meet with whoever took the horn
- Return the horn to Arngeir
Walkthrough
The mythical horn of Jurgen Windcaller is tucked away in Ustengravlocated slightly northeast of Morthal. Within Ustengrav, you’ll find many spellcasters, draugrs and standard cave-crawling fare. Make your way through the dungeon as you would in any other circumstance, but once you get to the Ustengrav Depths, things get a little trickier. There are fire traps sprinkled throughout this level of the tomb. Once you reach a great opening that careens into a waterfall, make your way down for a chest on a path to the left, and another chest through the waterfall.
Written on the wall at the base of the waterfall is a new Shout for you to master. You'll learn "Become Ethereal", but like with other Shouts, you'll need a Dragon's Soul to unlock it.
Note: There’s an Arcane Enchanter down here, but it’s locked away in a niche that can only be accessed after you’ve pulled two levers on the wall nearby.

Make your way back up to where you fought the Skeletons and cross the narrow bridge that leads across the chasm. There'll be a lone Skeleton pestering you, so take care of it. Once that one distraction is gone, you'll see three stones that light red when you walk past them. The first stone you pass corresponds to the first gate, the second stone to the second gate, and the third stone you walk past corresponds to the third gate. Make sure you have Whirlwind Sprint equipped as your Shout, and make sure your stamina is full. Sprint past the stones in their correct order, pull the first Whirlwind Sprint as you get past the first gate, and immediately pull the trigger again to get you past the next two. (Or you may find it easier to stand in front of the first rock, use Whirlwind Sprint, and then run through the rest of the tunnel.)


Once inside this new room, you'll hear triggers from the floor as you walk forward. Don't stop to look around, these are fire traps. You'll come to a raised platform area that's being guarded by two average sized Frostbite Spiders, and one larger one, though nowhere near the size of the one you fought in Bleak Falls Barrow. Defeat the Spiders and make your way towards the cobwebbed door frame. Remove the cobwebs and proceed to the wooden door.
After the wooden door, you will come to another gate. Pull the chain on the left to activate the gate and proceed forward. Stones will erect out of the bodies of water as you make your way down the steps.
Onward to the horn of Jorgen Windcaller... except it’s not there! In its place is a note written by “a friend” instructing you to spend the night at the Sleeping Giant Inn at Riverwood.
Behind the throne there's a chest with some good rewards: an Orcish Greatsword, 126 pieces of gold, potion of the defender, Spell Tome: Lesser Ward, and the Staff of Courage.
Head out and on to the Sleeping Giant Inn in Riverwood. Speak to Delphine and request the attic room. Head to sleep only to be woken by Delphine, at which point she finally relinquishes the horn and also initiates the quest, A Blade In The Dark.


Return to High Hrothgar once you can and present the horn to the Arngeir. You now have another Word of Power to learn: the final word of Unrelenting Force. Talk to Wulfgar to learn Push, forming the full Shout for Unrelenting Force.
Note : After returning the Horn to Arngeir, if you return to Ustengrav and activate the altar where you found the note, you will be granted a dragon soul .
- 0 Topics
- 0 Posts
A BLADE IN THE DARK
Objectives
After you do as the note instructed from The Horn of Jurgen Windcallerand rested in Sleeping Giant Inn, you will meet with Delphine who asks you to meet with her in private. She exposes a hidden room beneath the inn and wants you to prove that you are indeed the Dragonborn, clearly casting doubt on the Greybeards. Make sure you loot the basement, as there is a Blades sword that is very handy. Now you must prove that you are indeed the Dragonborn by killing the next dragon that she thinks may be returning to the lands of Skyrim.


Bring a durable Follower, like Lydia, and meet her at Kynesgrove, south of Windhelm. Afterwards, you find yourself fighting for your life against a dragon named Sahloknir. Having just woken from a long slumber, Sahloknir is still getting his dragon joints greased up -- use this opportunity to immediately unload on him. Get a Potion of Fire Resist up if you’re the cautious type as Sahloknir's cone of fire damages those who stand directly in front of him.


If you brought a follower as was suggested, the follower should be able to keep Sahloknir’s attention as you pummel him with high damage. Before long, the second dragon (of the main story) will fall yet again, leaving you to absorb the dragon soul and pick his bones... literally. Speak to Delphineafterward to complete the quest.

- 0 Topics
- 0 Posts
DIPLOMATIC IMMUNITY
Objectives
- Meet Delphine in Riverwood
- Meet Malborn in Solitude
- Give Malborn the equipment
- Meet Delphine at the stables
- Talk to Malborn
- Create a distraction and get away from the party
- (Optional) Retrieve your gear
- Search for information about the dragons returning
- Escape the Thalmor Embassy
- Talk to Delphine
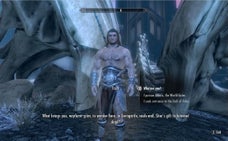
This quest begins as soon as Delphine sets off for Riverwood after A Blade In The Dark. The plan is to meet up with her there and hammer out the plan on infiltrating the Thalmor Embassy. You are to meet a trusted contact of Delphine’s named Malborn at Solitude. Malborn is slinking about at The Winking Skeever. There Malborn will ask you which possessions you'll need smuggled into the Thalmor Embassy (mainly your gear and some lockpicks would suffice).
Find Delphine at the stables outside Solitude and speak to her to receive some suitable party accoutrements. Speak once more to Delphine when you're ready to be whisked away to the Thalmor Embassy.


Upon your arrival, you meet a rather brazen bloke Razelan. Keep him at the forefront of your mind. After showing your invitation to the Thalmor bouncer and exchanging pleasantriess with the Ambassador, Malborn urges you to create a distraction so that you can sneak out. Grab a Colovian Brandy either from Malborn or the waitress and hand one to Razelan. With his eyes wide, he pledges his loyalty to you, his best and most trusted friend.


Ask him to create a distraction and slip out the back with Malborn. If you're concerned about replenishing your health, you can snag some food from the party at no penalty. Once you retrieve your gear from the chest, it's up to you to fight off the Thalmor guards in the back.
You'll have a few melee types and a wizard to contend with. Proceed ever closer to the quest marker, picking up various potions along the way. You'll encounter more enemies outside, but your main goal is to head into Elenwen's Solar to fight Rulindil and remove his Interrogation Chamber Key. Use it to gain entry into the torture chamber and pilfer the Thalmier Dossier: Esbern from the chest.


After perusing the dossier, you will be prompted to leave the Embassy. The torture chamber contains a trap door, but you'll first need to loot the Trap Door Key from a guard's body to open it.


The Reeking Cave, as this place is called, is home to a Frost Troll, but by this point you will have reunited with your followers (if you had any to begin with). Simply return to Delphine at Riverwood at this point to complete the quest. You'll find her in the basement of the Sleeping Giant Inn, which is accessed through a false panel in the wardrobe of the room closest to the front counter.
- 0 Topics
- 0 Posts
A CORNERED RAT
A Cornered Rat begins immediately after Diplomatic Immunity.
Objectives
- Talk to Brynjolf
- Search the Ratway for Esbern’s hideout
- Find Esbern in the Ratway Warrens
- Talk to Esbern
Walkthrough
Delphine recognizes the name Esbern and figures the man is hiding out in Riften. Esbern has major trust issues, so you'll need to first speak to Brynjolf. You'll find the guy in the outdoor market in the center of town; ask him about Esbern and, being the shrewd businessman he is, Brynjolf isn't too keen on giving out free information.


If your Speech is high enough, the persuasion option may forgo the small favor he requires: A Chance Arrangement. After finishing the quest, bring up Esbern again and he'll admit to knowing your guy.


Enter the Ratway located under Riften. Expect to find hostile riffraff in these underground tunnels. Navigate through the Ratway until you reach the entrance to The Ragged Flagon. Don't forget to quickly leaf through the Beggar for an instant skill pick-me-up to Pickpocket.


You'll find some Thalmor enemies in The Ragged Flagon. This multi-tiered, dank area leads to the Ratway Warrens, a holding place for some deranged folk, including Esbern. When you find him, he denies being who you think he is. He continues to feign ignorance until you mention Delphine. If you recall, she told you to say something that would buy his confidence: "remember the 30th of Frostfall."
At that point, he lets you into his personal...living space. The quest ends after speaking to him.
- 0 Topics
- 0 Posts
ALDUINS WALL
Alduin's Wall starts after speaking to Esbern in A Cornered Rat. It involves finding Sky Haven Temple with Esbern and Delphine to learn how to defeat Alduin.
Note: The mountain on which Sky Haven Temple sits (near Karthspire Camp) is not accessible until you reach this mission. A long jump/climb up the side of the mountain leaves you blocked by a developer's "invisible wall."Objectives
- Escort Esbern to Riverwood
- Talk to Esbern
- Gain entrance to the Sky Haven Temple
- Learn the secret of Alduin’s Wall
Walkthrough
Make your way through the Ratway once more, fending off a couple of Thalmor that have found their way in here. For your information, you can create a mini-shortcut by lowering the bridge in the Ratway.
Take Esbern to see Delphine in Riverwood. Let the two old friends talk it out and listen to what Esbern has to say.


Soon thereafter, you'll find yourself on your way to Sky Haven Temple, the home of Alduin's Wall. You could either reconvene with the Blades at Karthspire or travel together with both Delphine and Esbern. The latter choice has them tagging along with wherever you're going, obviously. This can be helpful to have a full party of minions fighting for you, but be careful about them literally obstructing your path in tight spaces.
Karthspire is best reached via fast traveling or taking the carriage to Markarth. Karthspire itself is a cave that is swarming with Forsworn, just like the adjacent Forsworn camp. Karthspire sort of serves as the lobby to the Sky Haven Temple.
Inside you must overcome two puzzles: the first of which involves rotating all three pillars so that the apple-shaped (supposed to be an arrow signifying Dragonborne) faces you; this lowers the stone bridge on the right. The next room is a death-trap if you walk on any tile other than the Dragonborne tile you saw earlier. Follow this narrow path of Dragonborne tiles to the chain on the wall and interact with it to simultaneously deactivate the trap and open a path forward.


Finally, when prompted, activate the blood seal in front of the statue's head, letting you inside Sky Haven Temple. Esbern proceeds to regale you with ancient stories of Alduin and his dragon cult based on the legends inscribed on the wall. It looks like the secret to banishing Alduin from this world again is fighting fire with fire; or in this case, find a very special Shout. Take this kernel of knowledge and see if the Greybeards know anything about it.


Before heading out, you can also request Esbern to give you the Dragonslayer's Blessing.
- 0 Topics
- 0 Posts
THE THROAT OF THE WORLD
Objectives
- Talk to Arngeir
- Learn the “Clear Skies” Shout
- Use the “Clear Skies” Shout to open the path
- Talk to Paarthurnax
- Learn the Word of Power from Paarthurnax
- Use your “Fire Breath” Shout on Paarthurnax
Walkthrough
Travel to High Hrothgar and find Arngeir. Arngeir is quick to grow boorash at the mention of a Shout to defeat Alduin, but eventually Arngeir will guide you to the courtyard to teach you how to get to Paarthurnax. Examine all three Words of Power on the ground around Arngeir to learn Clear Skies. Use this to disperse the heavy blizzard impeding your path to Paarthurnax.

En route to Paarthurnax, you'll need to use Clear Skies several times to brave the resilient blizzard. Be ready to pop a health Potion if need be.
Speaking to Paarthurnax takes time; he will teach you a Word for Fire Breath. Demonstrate the power of your Thu'um, using Fire Breath.

After indulging in Paarthurnax's long-winded philosophical speech, you move to the Elder Knowledge quest. Also before leaving, you can talk to Paarthurnax and learn about his meditation. From here, you can select one of the three bonus effects:
Fus (Force Without Effort)
You stagger 25% less and foes stagger 25% moreFeim (Eternal Spirit)
Your health regenerates 25% faster while in Ethereal formYol (The Fire Within)
Fire Breath Shout deals 25% more damage
- 0 Topics
- 0 Posts
ELDER KNOWLEDGE
Objectives
- Learn the location of the Elder Scroll
- (Optional) Talk to Arngeir or Esbern
- Travel to the Alfland Cathedral (in Alfland Glaciul Ruins) and use the Lexicon given to you by Septimus Signus(from the quest Discerning the Transmundane) to recover the Elder Scroll
- Be Lvl 15 or higher to begin the second half of the quest
Preparing for the Quest
This quest may be completed simultaneously with the quest Discerning the Transmundane on one playthrough.
After questioning either Esbern or Arngeir, you are led to the College of Winterhold. An Orc named Urag gro-Shub is the man to talk to about the Elder Scroll. From this point, Discerning the Transmundane intersects with Elder Knowledge.

You'll need to find Septimus Signus in order to find out more about the Elder Scroll. Just set the quest as active then head to the marked location in the map to find Septimus Signus's Outpost.


After learning the location of the Elder Scroll (in Alfland Glaciul Ruins) head to the depths of Alfland Glaciul Ruins. The player will battle several Dwarwen Spider Workers and one or two Dwarven Spheres. Both enemy types are weak to Fire, Spark, and reasonably skilled weapons. There are several chests of varying difficulty (the highest being Master) throughout the Alfland Dwemer Ruins.
ENTER THE ALFLAND ANIMONCULORY
This area should introduce the player to the Falmer GloomLurker and the Falmer Skulker (unless you do some side quests).
ENTER THE ALFLAND CATHEDRAL
Kill Umana and Sulla Trebatious.
OPEN THE TOWER OF MZARK
Battle and defeat the Dwarven Centurion. Open the gate at the altar on the pedastal adjacent the gate with the Key taken from Dwarven Centurion. This opens to an area filled with neon glowing mushrooms. In the small village there are several Falmer stalkers, servants, and archers.
Tip: After activating the lever, the Dwarven Centurion will attack. Simply head out the gate, back to the lever--switch it back, and lock the Dwarven Centurion. This will make it easier to kill him. (edit: If you stand behind of the gears and all the way to the right you don't need to actually open the gate to attack him.)
Tip #2: If your character is skilled in archery and stealth, it makes this particular easy, but that is not a mandatory requisite to pass throughACTIVATE THE DWARVEN MECHANISM


Put the Lexicon in the slot to the right and press the button at the far right. Then, press the button next to it. If the third button (to the left of the second) doesn't appear, then keep pressing the 2 on the right randomly and the third should show up. Then press the third button and the dwarven mechanism moves, then opens the slot for the fourth button, Then finally press that one. Congratulations you just obtained an Elder Scroll!


Don't forget to retrieve the Runed Lexicon from the altar either. You may now engage in other tasks, such as: returning the Lexicon to Septimus Signus in his outpost up north or return to the Throat of the World and see if Paarthurnax will ask you to read the Elder Scroll.
- 0 Topics
- 0 Posts
ALDUINS BANE
Objectives
- Read the Elder Scroll at the Time-Wound
- Learn the “Dragonrend” Shout from the Nord heroes
- Defeat Alduin
Walkthrough
Return to the Throat of the World to read the Elder Scroll at the Time-Wound. You will find the Elder Scroll in the Books section of your menu. For a while, you'll watch a flashback depicting how the Nord Heroes had banished Alduin from Skyrim. By the end of it, you learn Dragonrend.

At this point, you'll have to fight Alduin. Paarthurnax will help you, but he won't do much in terms of damage. The key is to use Dragonrendconstantly on Alduin to keep him grounded, when he is most vulnerable to attack. Use Dragonrend whenever the global cooldown runs down to avoid having to snatch him from the sky.


Be careful not to accidentally use Dragonrend on Paarthurnax, however. They can sometimes be easily confused.


Alduin fights like any other dragon you've encountered: flies around, spews fiery or icy breaths (in this case both), and snaps with his mighty jaws. Avoid falling debris and keep a steady offense on Alduin to wear him down.
- 0 Topics
- 0 Posts
THE FALLEN
Objectives
- Talk to Paarthurnax or Talk to Arngeir or Talk to Esbern
- Talk to the Jarl of Whiterun
- Get Greybeards' help in negotiating a truce
- Learn Shout to call Odahviing
- Prepare trap for Odahviing
- Call Odahviing to Dragonsreach
- Defeat and trap Odahviing
- Interrogate Odahviing
Walkthrough
Paarthurnax reveals that Dragonsreach in Whiterun was built initially to hold other dragons. His idea is to capture one of Alduin's ilk and convince the captive to betray Alduin. Before that happens, however, you'll need to convince Jarl of Whiterun first.


Jarl Balgruuf (or whoever is in his place following the events of the Civil War) fully comprehends the threat of the World-Eater looming over him like a dark shadow, an even greater threat -- the clash between the Stormcloaks and Imperial Legion -- perturbs him even more. So, if you haven't already done some part of the Civil War Quests, the quest Season Unending begins, during which you are to negotiate a peace council to help suspend the civil strife while the dragons are taken cared of.
Note that if you already ousted Jarl Balgruuf from Dragonsreach during Battle For Whiterun, Jarl Vignar Gray-Mane in Jorrvaskr will take his place.
Glitch: If you are in the middle of the Civil War Quests and have chosen a side when Season Unending begins, there's a chance that you might encounter a glitch in which you can't proceed with either the Civil War quest or negotiating the truce. It's best that you finish Battle For Whiterun before you speak with the Jarl.
Learn the Call Dragon Shout from Esbern, who also gives you the quest to slay Paarthurnax for his past crimes on humanity.


Using Call Dragon at the end of the balcony will call this dragon down. As the dragon enters, he'll pick up the guard, leaving just the sword and torch behind. From here this quest is really simple. Whenever you get the chance, hit the dragon with Dragonrend and run inside the large opening. The dragon will land on the balcony and follow you in and be captured by the trap waiting above.


Speak to Odahviing to negotiate an agreement to help each other.
- 0 Topics
- 0 Posts
SEASON UNENDING
Objectives
- Talk to Arngeir
- Talk to General Tullius
- Talk to Ulfric Stormcloak
- Talk to Arngeir
- Take your seat
- Negotiate a truce
Walkthrough
This quest occurs if you haven't resolved the civil war conflict between the Stormcloaks and Imperial Legion.
Glitch: If you are in the middle of the Civil War Quests and have chosen a side when Season Unending begins, there's a chance that you might encounter a glitch in which you can't proceed with either the Civil War quest or negotiating the truce. It's best that you finish at least Battle For Whiterun before you speak with the Jarl.


Head to High Hrothgar and speak to Arngeir. Because of Paarthurnax' allegiance to the Dragonborn, the Greybeards, by association, must also walk down the same path. You must now speak to both Ulfric Stormcloakand General Tullius to remind them of the Greybeards' authority.


Ulfric can be found at Windhelm, whereas General Tullius presides over Solitude. Once everyone has convened at High Hrothgar, the council can proceed. Take your seat at one end of the table and wait for the negotiations to unfold. Also learn the Call Dragon Shout from Esbern.
- 0 Topics
- 0 Posts
THE WORLD-EATERS EYRIE
The World-Eater's Eyrie begins after you've interrogated Odahviingduring The Fallen.
Objectives
Walkthrough
Make sure you're adequately prepared for the challenge ahead; there's no leaving the dungeon until you finish the quest.


The only way for you to reach Skuldafn is by way of a dragon's help -- in this case, Odahviing's. Set him free by speaking with the soldier above (don't have your weapons out at this point or everyone will attack Odahviing upon release). Talk to the freed dragon to take off to Skuldafn. You can expect to find many Draugrs and a Dragon or two haunting the outside of the entrance. Now head into the Skulldafn Temple.
Venture through Skuldafn dungeon to reach the gateway to Sovngarde. The dungeon of Skuldafn is full of undead Draugr so it is recommended to bring with you magic or weapons that are particularly useful against undead.


Throughout your dungeon crawl, you'll encounter two of the game's signature "pillar puzzles." The first one has three sets of animal engravings in the center of the room. Shift them like so in the screenshots -- basically, the outer ones need to be facing their respective animal engravings on either side, and then spin the middle one until the snake carving faces the lever. Pull the lever to open the left gate and continue onward.


In the second puzzle, one pillar rests on the bottom floor while the other two are located in alcoves above. The idea is to match the patterns of the engravings shown above, and on the one behind the movable pillar on the bottom floor to successfully lower the drawbridge.


The Draugr Overlord you encounter deeper in possesses a Diamond Clawyou need to progress. Match the correct sequence on the huge stone door with the sequence on the Claw itself as you have been with previous puzzles to open the door.


A Word Wall in here teaches you the Storm Call Shout, but beyond that you are led right back outside to tango with strong variants of Draugr.


At the portal, you will need to defeat Nahkriin, the Dragon Priest. Defeating Nahkriin can be a challenging task. To recharge your health and Magicka in battle, hide behind the pillars and Nahkriin will not be able to hit you.


Use the pillars to your advantage and pop out to shoot a ranged spell or arrow then duck again. If Nahkriin does come behind the pillar, circle around the pillar so you're on the opposite side of him. Attack at every ripe opportunity. Once you defeat him, he will drop the Nahkriin mask and also the Dragon Priest Staff which you take back up the stairs to enable the portal again.


- 0 Topics
- 0 Posts
SOVNGARDE
Objectives
- Find out how to defeat Alduin
- Gain admittance to the Hall of Valor
- Talk to the heroes of Sovngarde
Walkthrough
Once you enter the portal you will receive this quest and enter what looks like a foggy valley. Follow the path and you'll run into a Stormcloak soldier who will you bring you up to speed on the current events.
Eventually you get to a crossroad: the left will lead you to a ruin and the right side will take you to where you need to go.

Just follow up the right path until you run into Tsun. Before entering the Hall of Valor, you must prove that you are worthy to Tsun. Tsun is a powerful axe-wielder; he can inflict significant damage at close range, but he can also be kept at bay with Light Armored, nimble fighters, allowing them to run away and "kite" Tsun. His health doesn't need to be drained completely, but damage him enough to about 60% and he will yield.


Cross the giant dragon scales that acts as the bridge and talk to the Heroes that defeated Alduin before you: Gormlaith Golden-Hilt, Hakon One-Eye and Felldir the Old.
- 0 Topics
- 0 Posts
DRAGON SLAYER
Objectives
- Help the heroes of Sovngarde dispel Alduin's mist
- Defeat Alduin
Resolution is nigh! Walk outside of the hall with the heroes and cross the bridge. Once on the other side of the bridge, you will be told to clear the mist together. Use your Clear Skies Shout three or four times to dissipate the mist and call Alduin down.


The only thing you absolutely have to try your best to do is just keep Alduin on the ground and stun him as much as possible. The fight is really simple if you have abilities to stun opponents. Otherwise, you have to throw everything you have at him and avoid getting roasted by Alduin's powerful firebreath. Dragonrend and stuns can definitely help bring Alduin down.


Once Alduin is dead, talk to Tsun and he will teach you a new Shout and send you on your merry way back to the living world.


You should end up at the Throat of the World with many dragonssurrounding you. If you didn't kill Paarthurnax, he will talk to you and tell you that now that all the dragons no longer have a leader, he will do his best to persuade them to follow the ways of the voice and fly away.
Congratulations after you have completed this quest you will have completed the main storyline of Skyrim.
- 0 Topics
- 0 Posts


QRF GAMING :: GAMES HELP :: SKYRIM :: MAIN QUEST HELP
- Topics
- Replies
- Views
- Last Posts
- No message.
Users browsing this forum: None
None
You cannot post new topics in this forum
You cannot reply to topics in this forum
 New posts
![New posts [ Popular ]](https://2img.net/i/fa/prosilver/topic_unread_hot.gif) New posts [ Popular ]
New posts [ Popular ]![New posts [ Locked ]](https://2img.net/i/fa/prosilver/topic_unread_locked.gif) New posts [ Locked ]
New posts [ Locked ]
 No new posts
![No new posts [ Popular ]](https://2img.net/i/fa/prosilver/topic_read_hot.gif) No new posts [ Popular ]
No new posts [ Popular ]![No new posts [ Locked ]](https://2img.net/i/fa/prosilver/topic_read_locked.gif) No new posts [ Locked ]
No new posts [ Locked ]
 Announcement
 Sticky
 Global announcement
|
|
|